Parking Brake Solutions for the 14-Bolt Full Floating Axle

Chad Rankin • 20 May 2025

Parking Brake Solutions for the 14-Bolt Full Floating Axle

It is well known that the 14-bolt full floating GM axle (1973-1987) is a strong, cheap, and robust solution for off road / 4x4 use. The earlier axles had large drum brakes that included an integrated parking/emergency brake. While the drum brakes work okay if they are regularly serviced and kept clean, disk brakes are much lighter and in general outperform drum brakes in terms of maintenance, braking performance, and resistance to debris (e.g., water crossings). There are good disc brake conversions available using the front calipers from a ¾ ton Chevy truck (e.g. RuffStuff). The conversion kit, however, does not address the parking brake. For trucks equipped with an automatic transmission, lack of a park brake is not the end of the world but for a manual transmission it is essential.


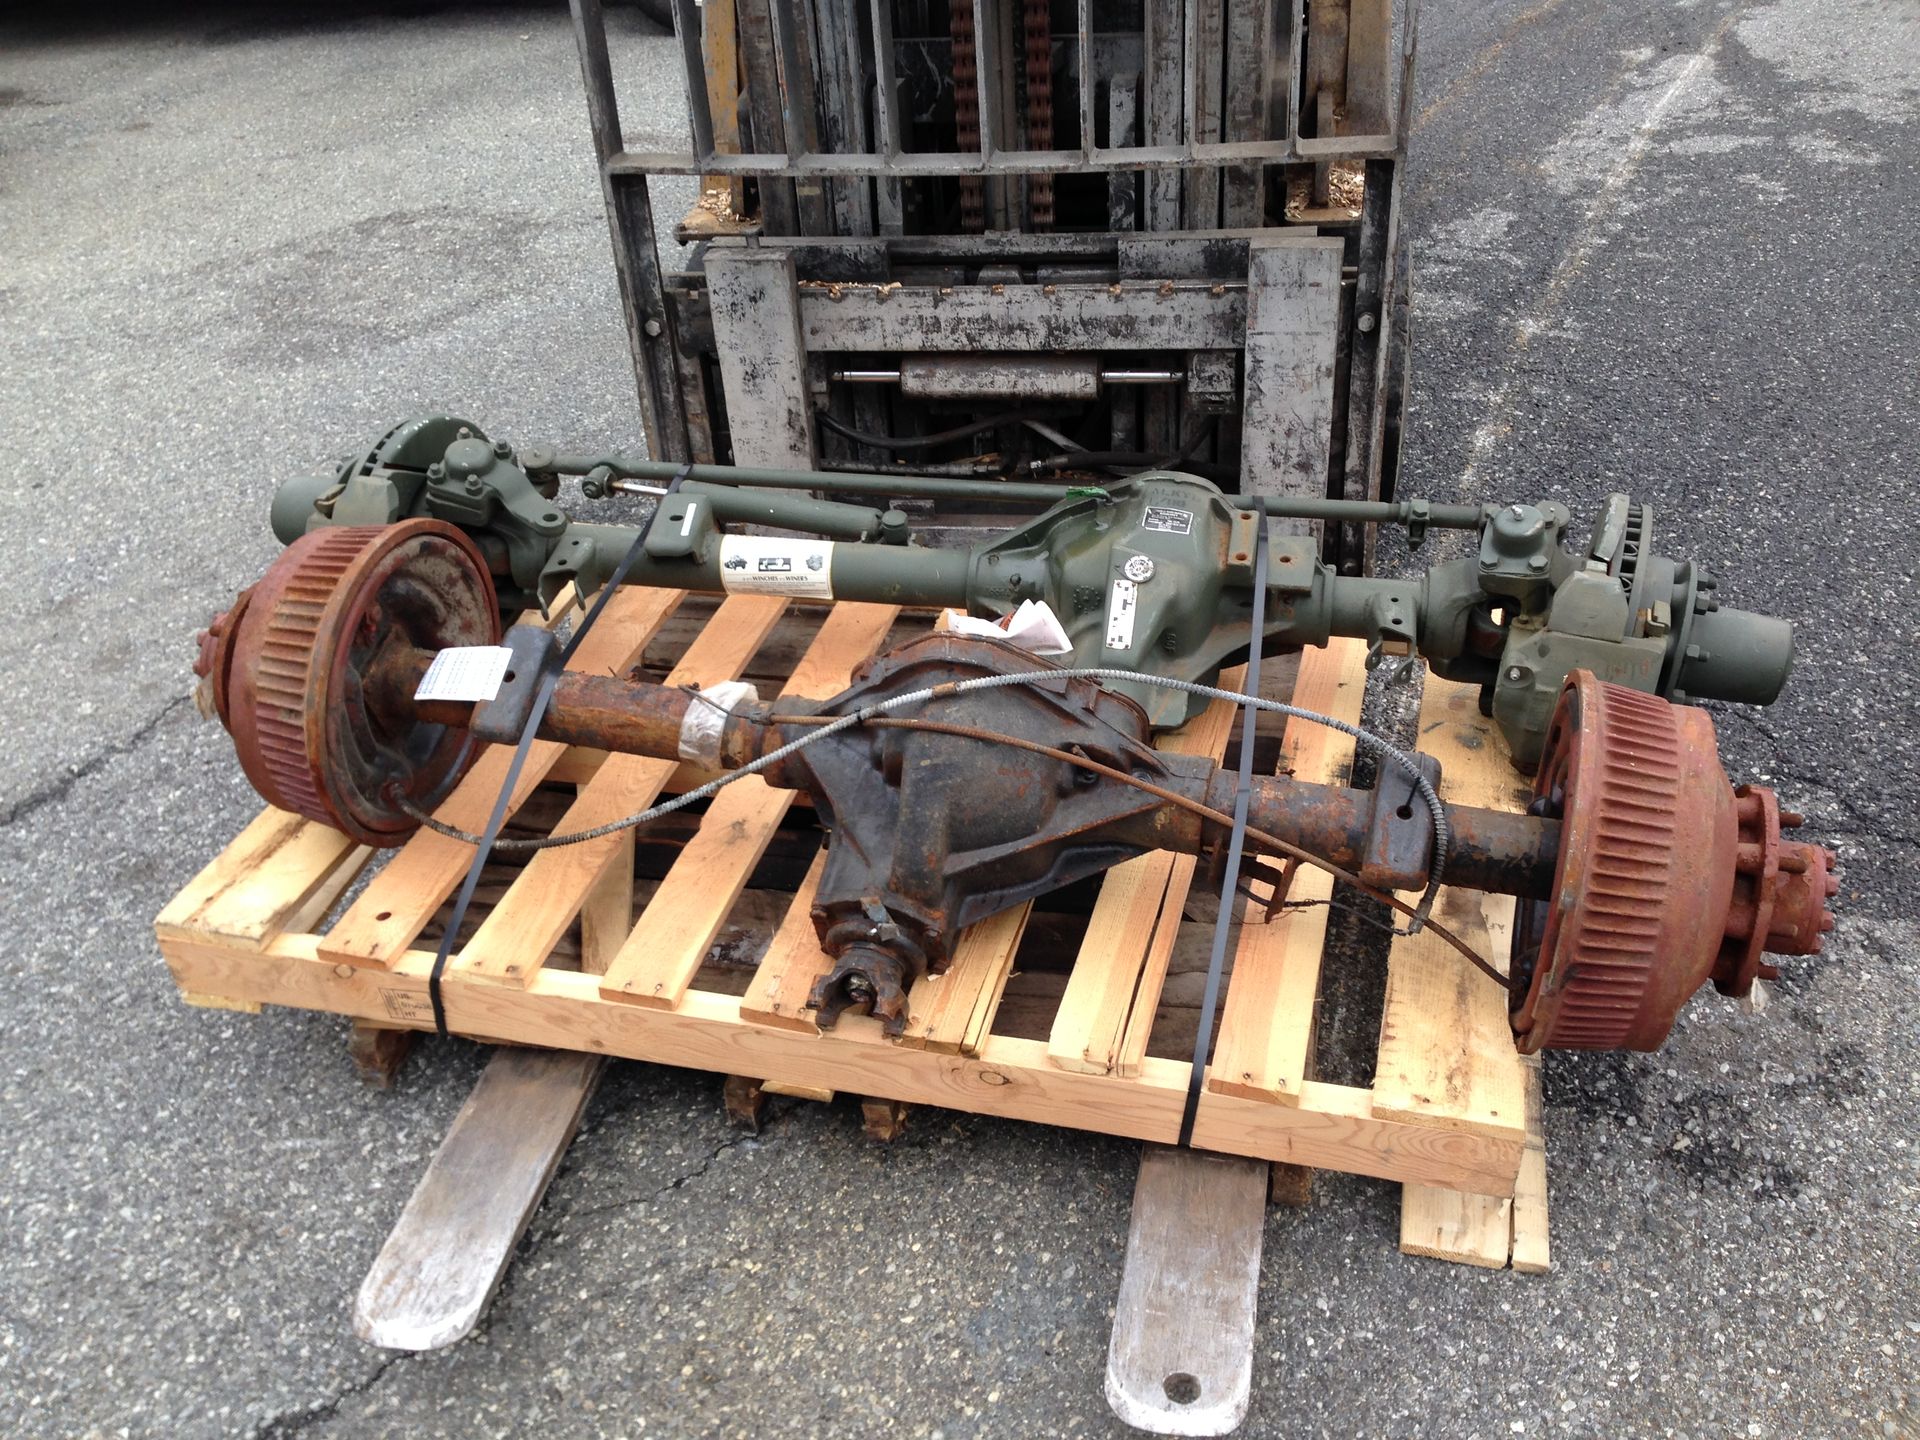
Shown below is the 14-bolt axle for the shop truck prior to disk brake conversion.


Drive Line Brake

One solution to the parking brake issue is a drive line brake that locks the driveshaft in position. This approach is particularly appealing to those who have an Atlas transfer case, since High Angle Driveline, among others, makes the following kit.

The brake can easily be installed to use the stock parking brake pedal. We had a driveline brake on the shop truck initially and found it to work okay when the truck was outfitted as a half-ton truck. Once the 1-ton driveline was installed the truck took on a significant amount of weight and the driveline brake simply would not hold the truck on even a modest incline. A non-trivial problem with the driveline parking brake is the presence of oil leaked from the powertrain. Even a slight leak can cause complete failure of the brake.


Eldorado Brakes

Another popular solution is the rear calipers from the 76-78 Cadillac Eldorado. The caliper has an integrated mechanical brake that is actuated with a cable connected to the parking brake pedal. My understanding is the brake system did not work all that well in the OEM application.

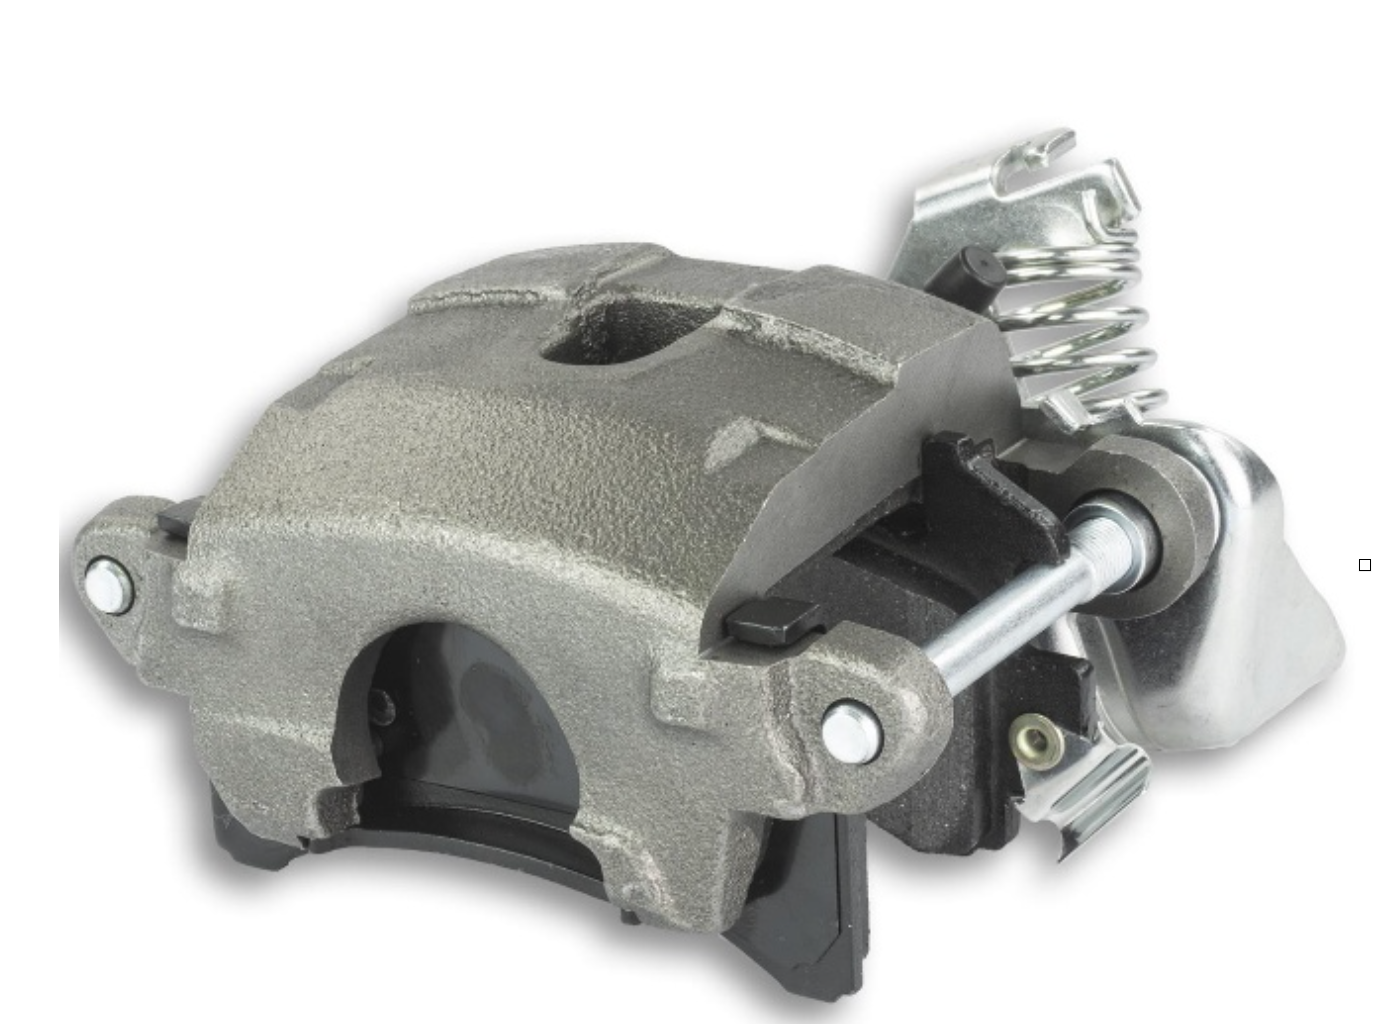
A point to consider is that the size of the caliper was engineered to work on a car, which by comparison with a fully loaded adventure rig is perhaps not enough braking power. We also tried this solution on the shop truck with poor results. The calipers were undersized for the weight of the truck and the parking brake did not hold even on modest inclines.


Electric Brakes

Many late model cars have an electric parking/emergency brake. The brake consists of a separate caliper complete with separate pads. The composition of the pads can be rather aggressive to provide as much bite as possible without a need to last through many braking cycles. The caliper contains a linear actuator that builds pressure on the pads to lock the rotor stationary.


For the shop truck, we purchased an electric brake kit from Wilwood (UPC 88954509467) that includes a controller and wire harness.  

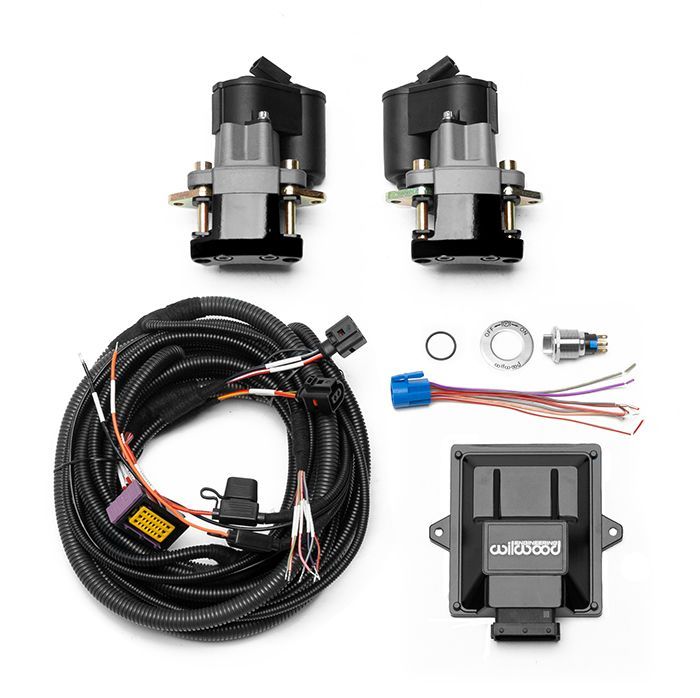
Wilwood now has a high-torque version for heavy duty applications. As it turned out, the wire harness fit the shop truck perfectly without need for significant alteration. We did rework it to have a motorsports grade loom using Raychem DR-25 tubing and sealed connectors/boots we sourced from Prowire.


Another perhaps lower cost approach is to get a controller through Pantera Electronics and use Ebay Tesla electric brake calipers.


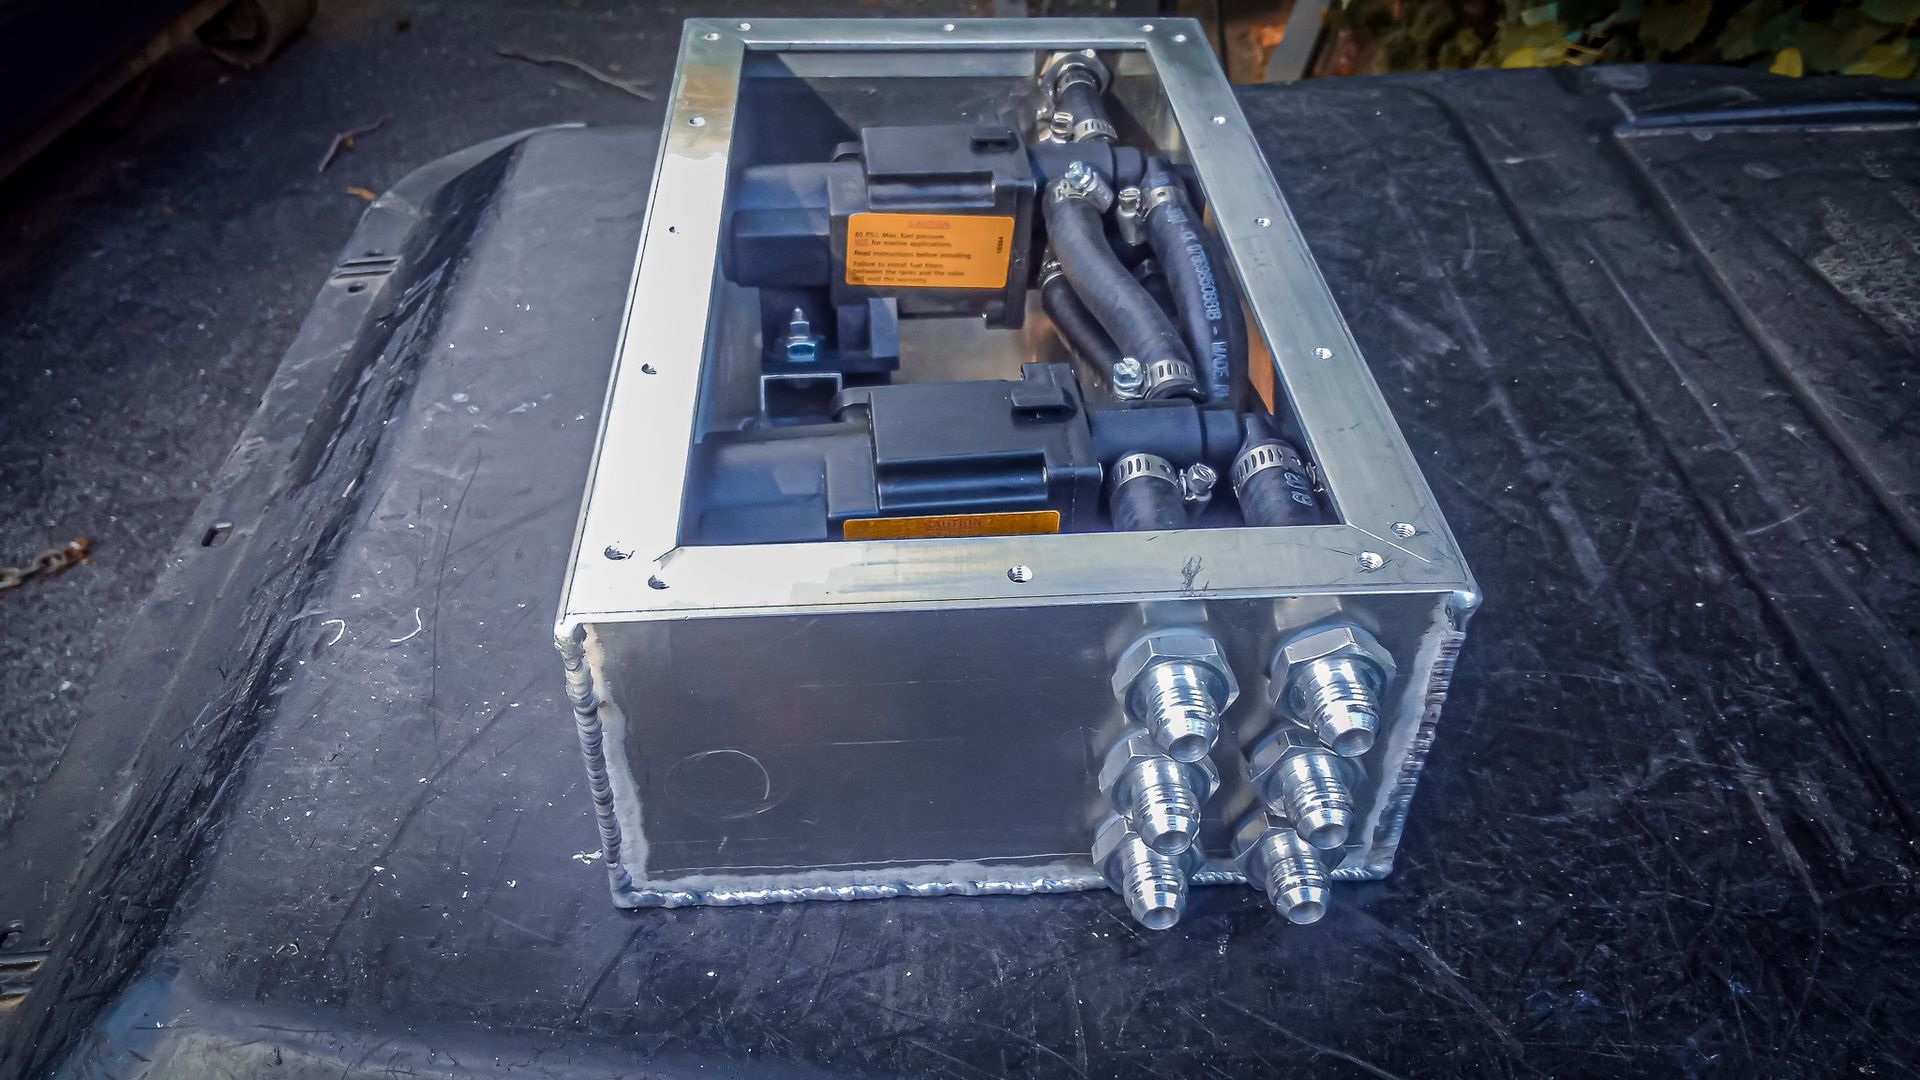
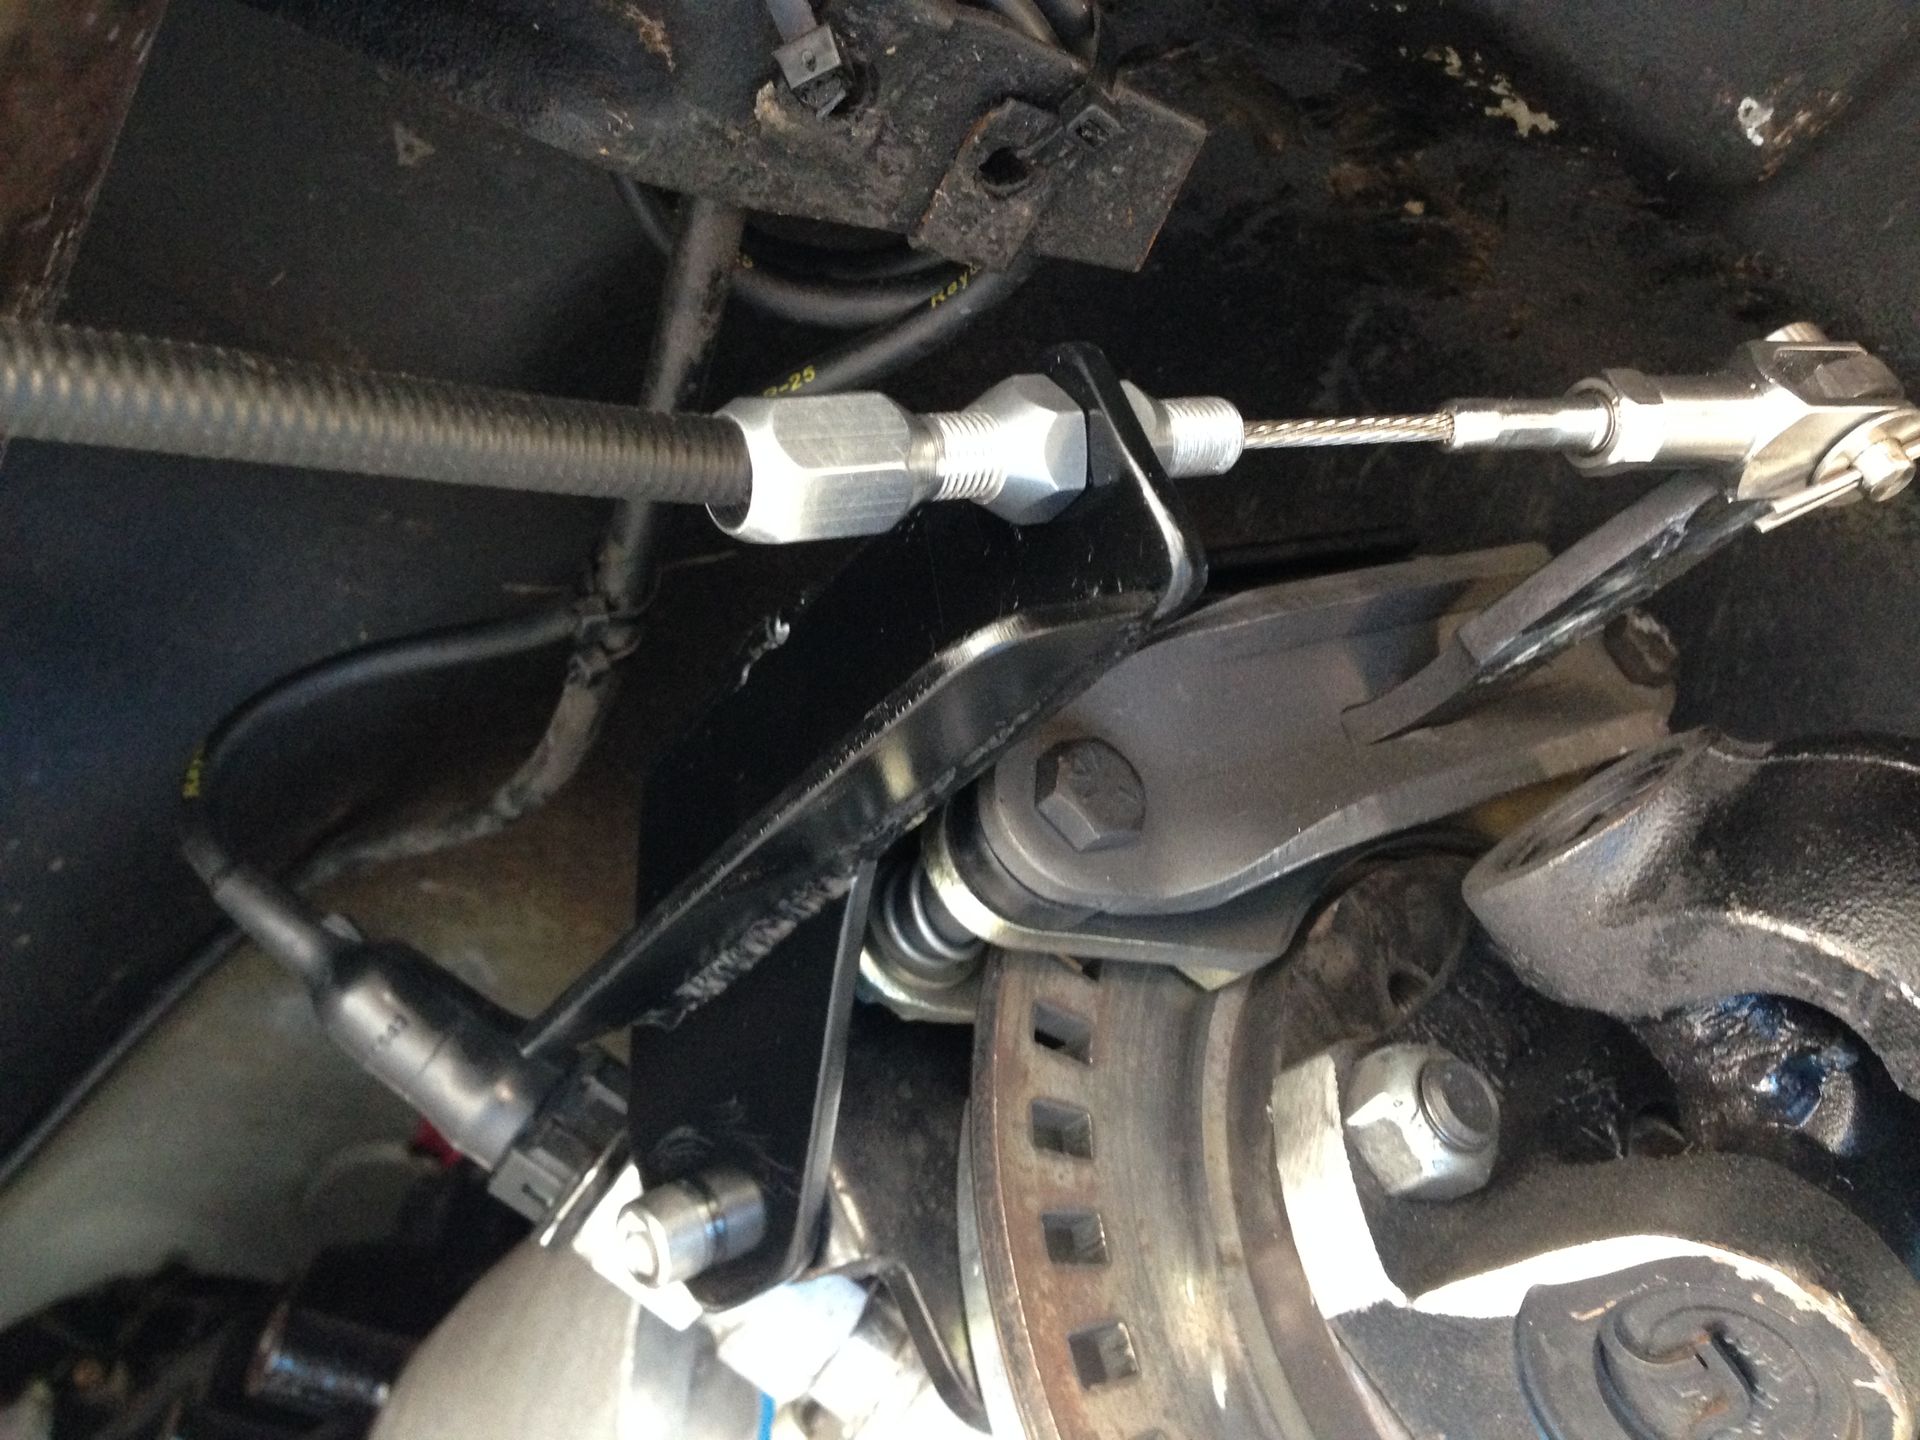
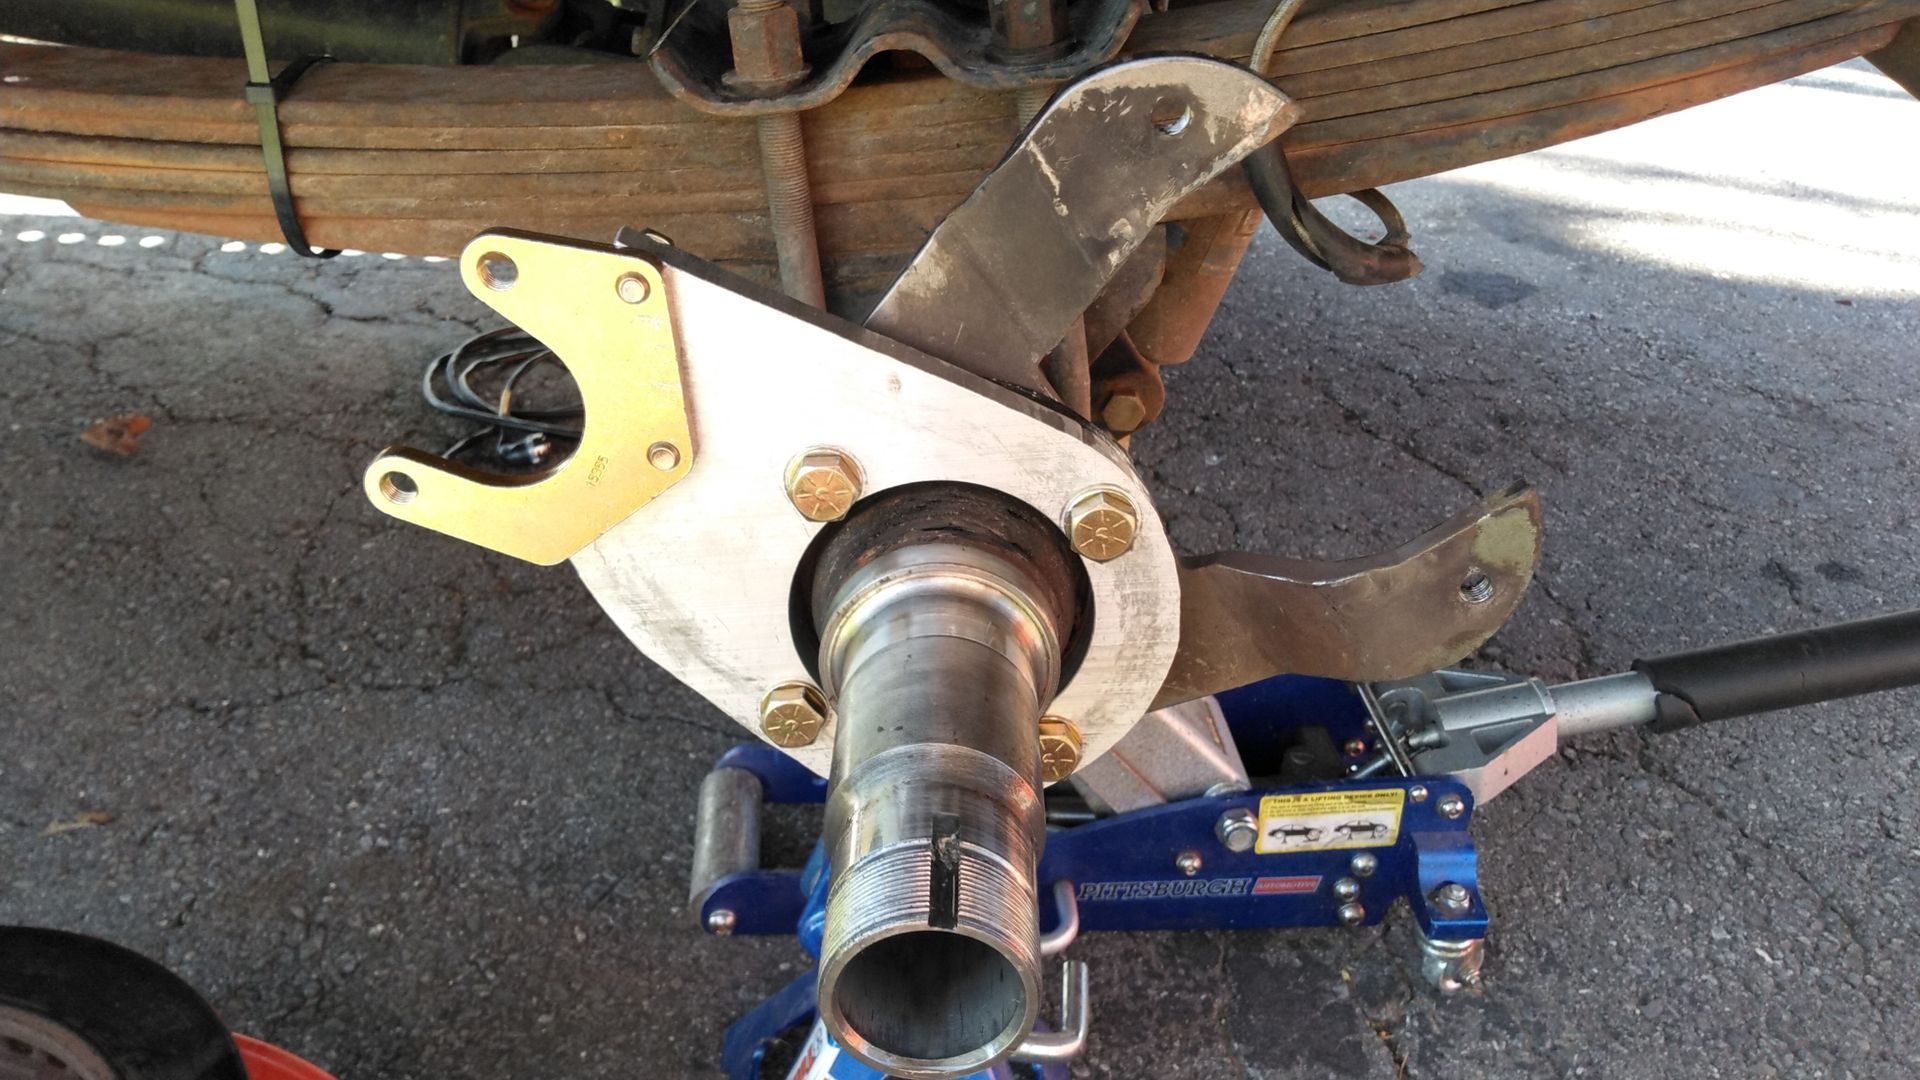
The task for our approach was to find a means of spacing the ordinary brake caliper as well as the electric caliper such that the electric caliper was properly aligned. The way we did it for the shop truck was to first mount the standard caliper using an adapter from RuffStuff. The kit from ORD would not work because it uses a spacer ring—whereas the RuffStuff bracket is bent to achieve alignment. We then worked out that we could use the Wilwood mounting plate in conjunction with a half inch aluminum adapter. All we had to do is determine the proper distance from the hub. Here is a shot of our solution.
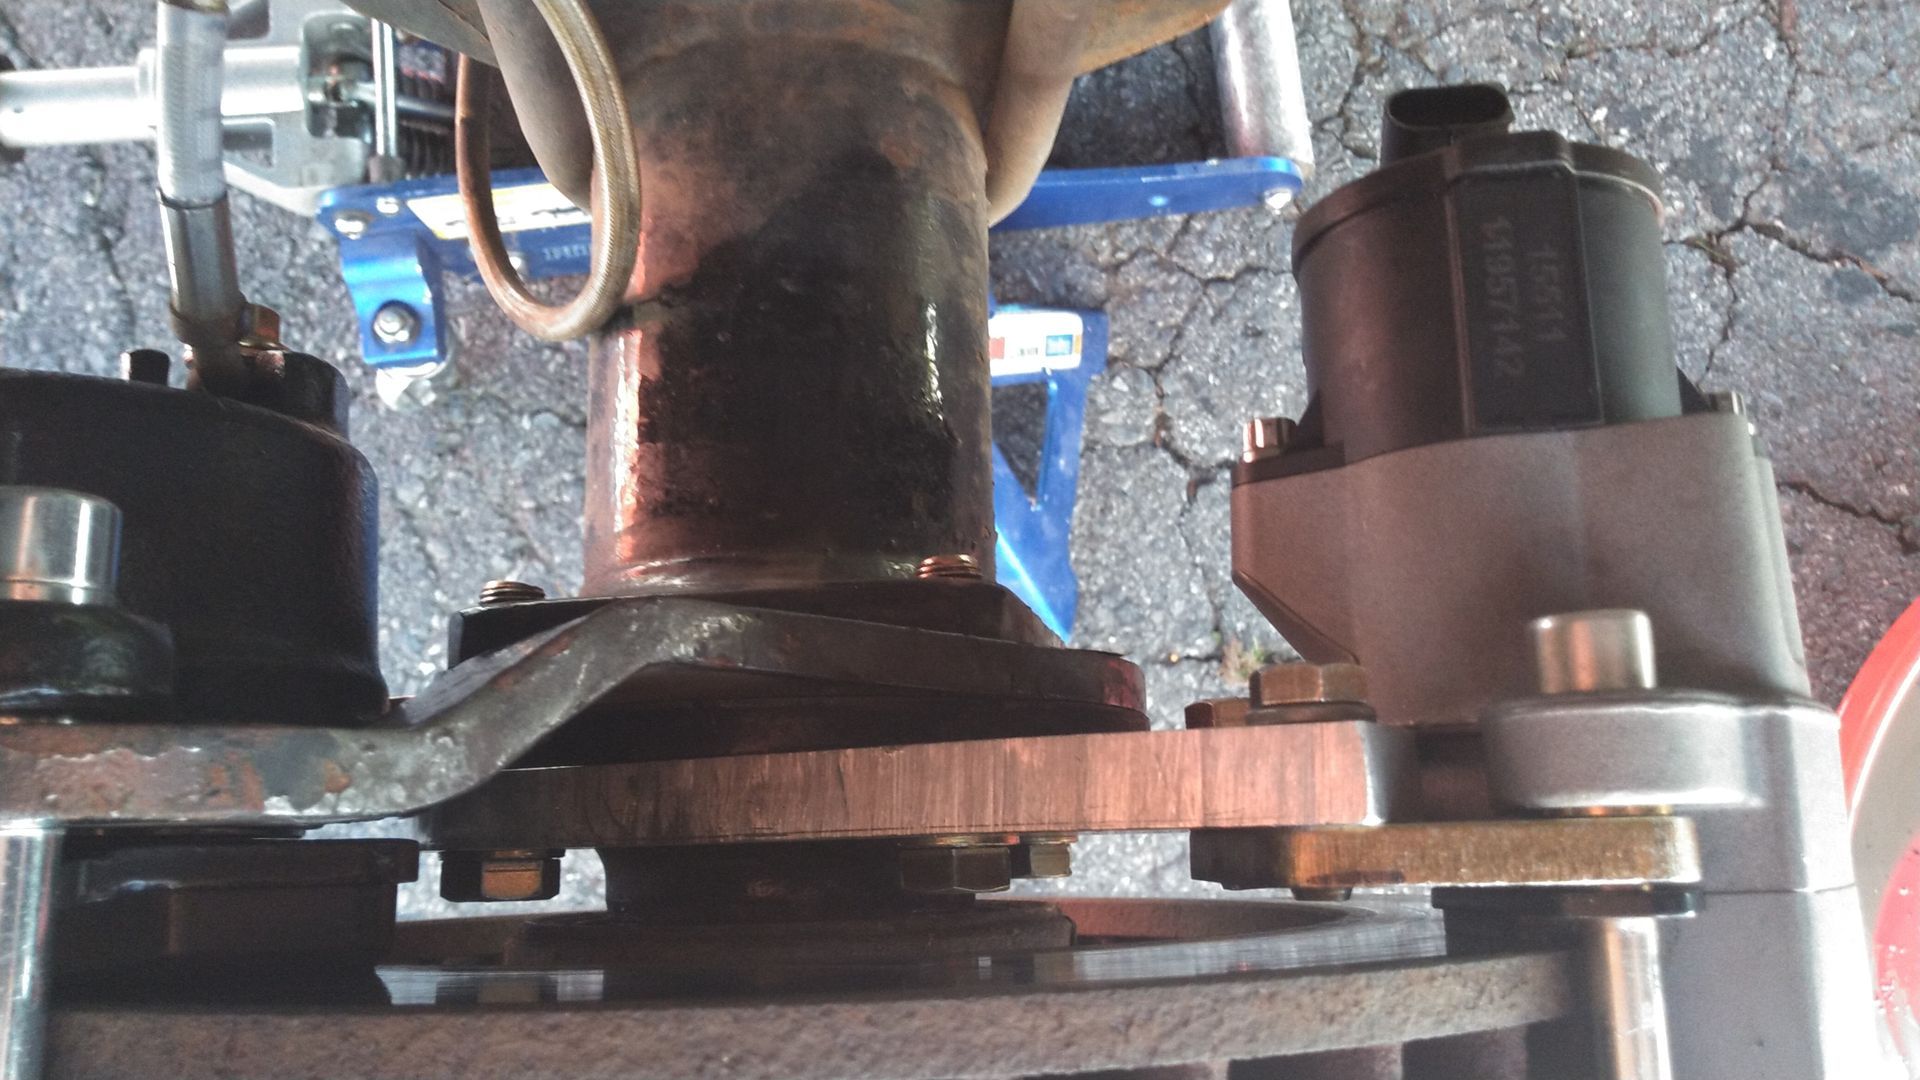
And from the top.

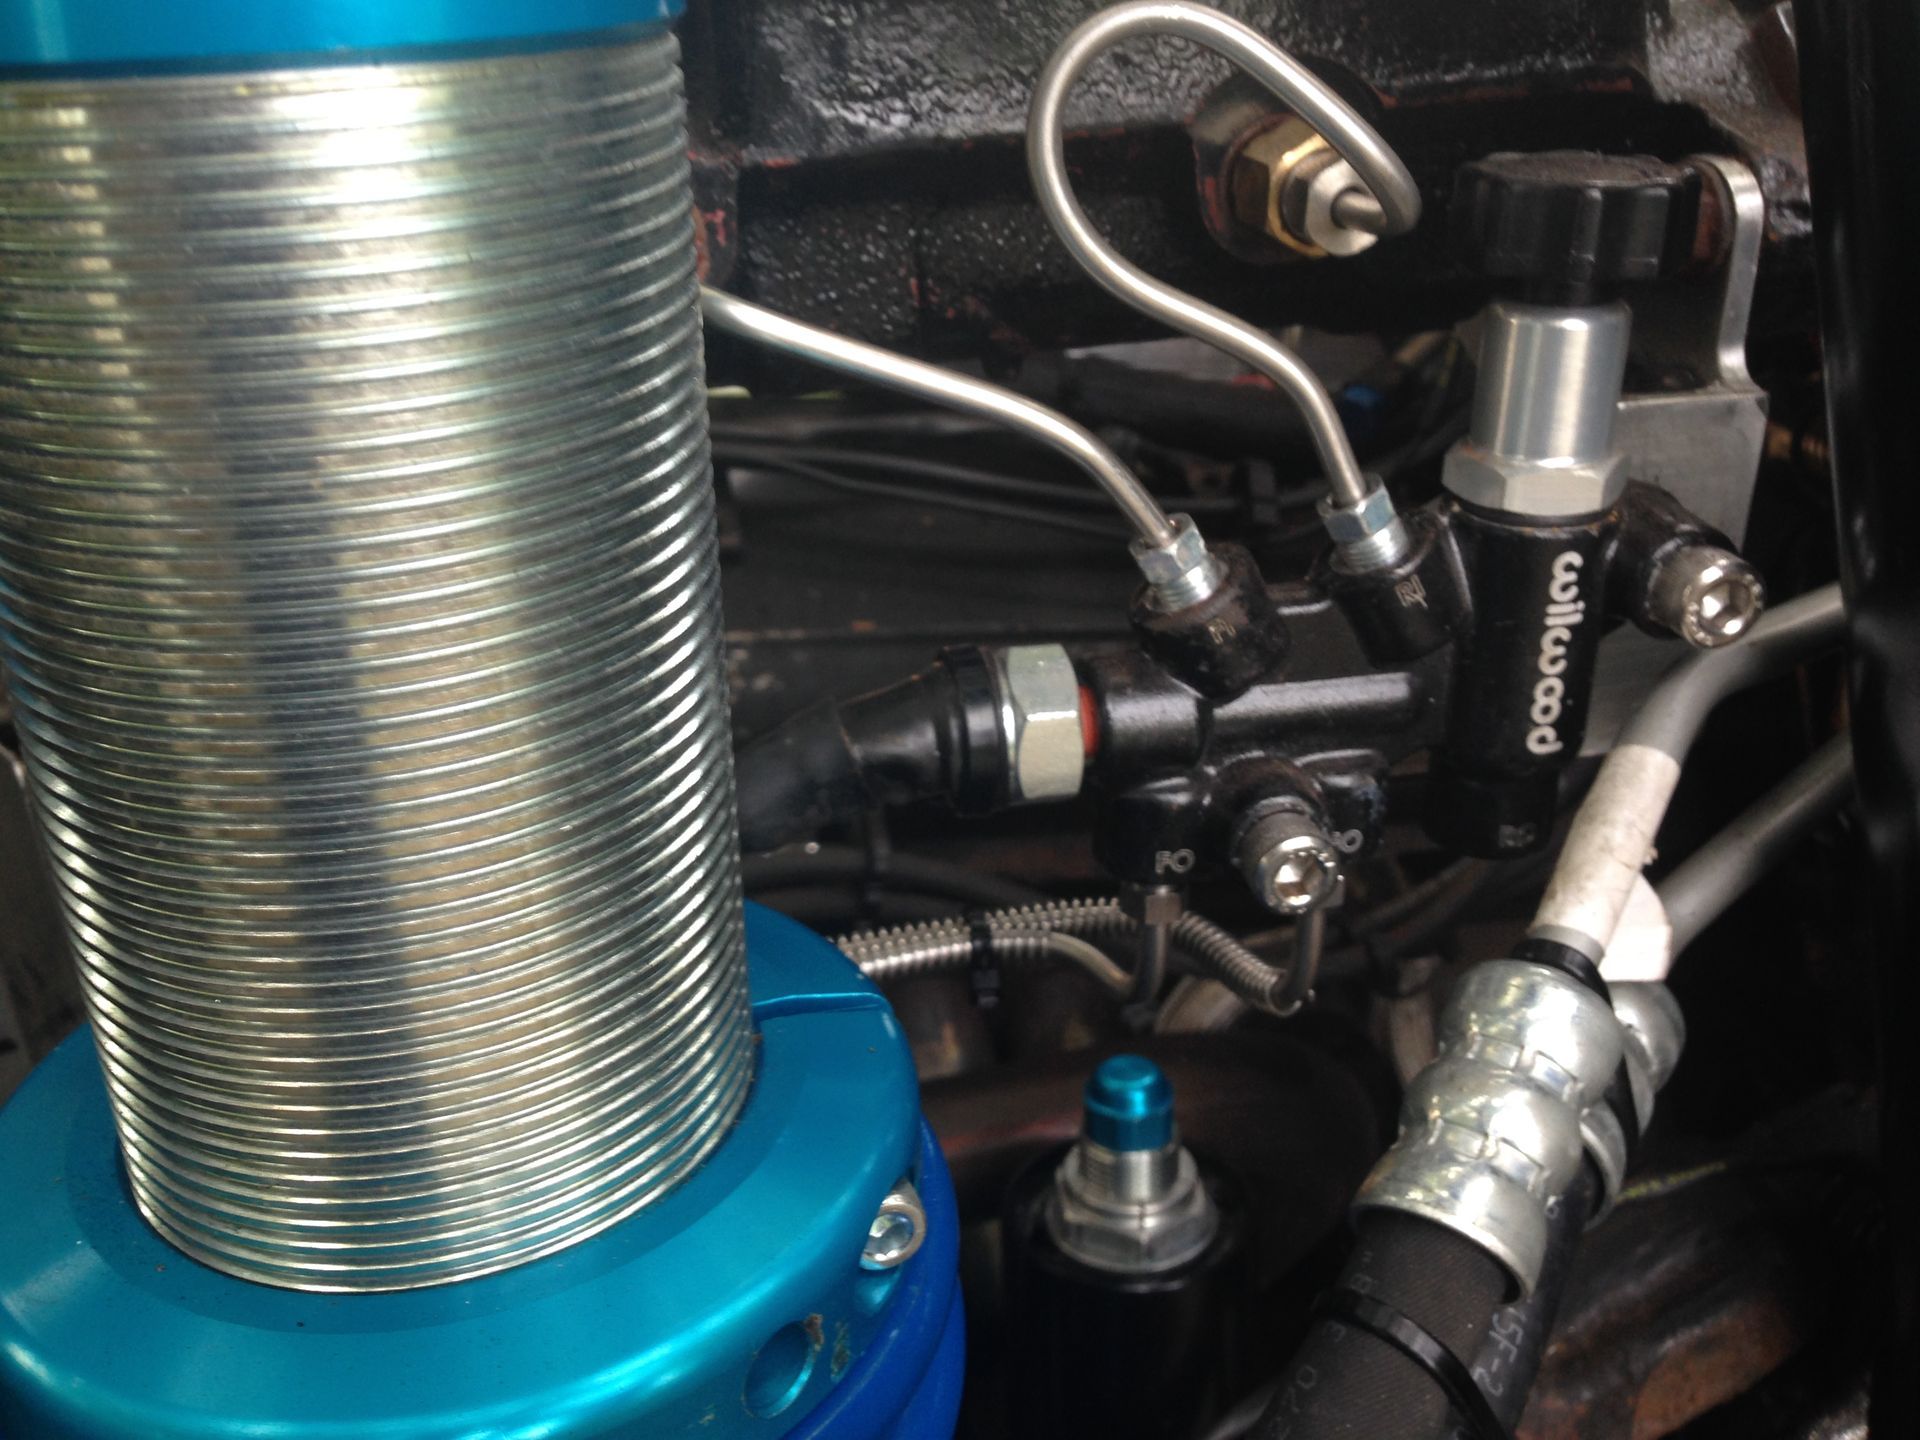
While we were at it, we decided to include a Wilwood adjustable proportioning valve to tune an appropriate front/rear braking balance.

We have tested out parking brake solution for several years now and it has performed flawlessly. It will hold the truck on steep inclines and does a good job as an emergency brake. We might include our adapter plate as a product on the website in the future.

Retractable Kitchen for overlanding and 4x4 Truck and Jeep
by Chad Rankin 22 May 2025
Why Do I Want a Retractable Kitchen
by Chad Rankin 15 May 2025
Overlanding Fuel Systems Fuel Volume If we think about overlanding in the most dramatic of ways, it could involve travel to extremely remote locations. Fuel stations are not common in remote locations, so having sufficient quantities of fuel to get to, explore, and return from your place of interest is critical. So, how to provision for adequate fuel? On Board Storage One solution to making sure you have enough fuel is to bring additional along with you in jerry cans or other fuel containers. There arise several complexities to this approach, including the safe storage of fuel—ideally, fuel should be stored outside of the vehicle. Pickup truck beds notwithstanding, many overlanding rigs are limited in where bulk stores of fuel can be placed. Storing multiple jerry cans on the roof rack is not ideal, given the dynamics of weight that high up and the impact to the vehicle center of gravity. On remote trips, particularly with gasoline engines, numerous jerry cans would be required. Adding Fuel Tanks Where space permits, increasing the size of the vehicle’s primary fuel tank is an attractive solution. Given the stock location of the tank, the vehicle dynamics would change little. Some vehicles, particularly trucks, offer as a factory option a larger tank. However, in many if not most cases, it is not possible to increase the size of the stock fuel tank. Another option is to add additional fuel tanks to the vehicle. This of course assumes there is real estate available to do so. The location of the tank would be as low as possible and therefore impact vehicle dynamics far less than when storing fuel on board. However, certain complexities arise with respect to the integration of multiple tanks such as the following. How does the additional tank connect to the vehicle fuel system? Does the tank transfer fuel to the main tank? Does the tank supply fuel to the engine? Is the fuel pump in-tank or external? Does the auxiliary tank contain a fuel level sensor? Fuel Risk Management A key element to successful remote overlanding is effective risk management. Adequate fuel provisioning is certainly one element of risk to manage. In addition, it is worthwhile to generate scenarios (failure modes) as to what could fail and leave the adventurer stranded. While modern fuel systems are certainly robust when new, a failed fuel pump could serve as a significant problem when remote. One solution is to assess the likelihood of fuel pump failure and replace it with a new one. In addition, brining along a spare pump could be money well spent. Understanding the process for changing the fuel pump is an additional risk management measure that one would be wise to consider. The process for changing a fuel pump is rather straightforward with some vehicles and difficult with others. In some cases, a nearly full fuel tank would need to be dropped in order to access the fuel pump. In addition to the pump, the risk presented by the fuel filter should be considered. A partially clogged or completely clogged filter could represent an unacceptable risk. Again, risk mitigants include changing an older filter prior to the trip, carrying a new filter on board, and an understanding of the procedure for changing the filter. Fuel lines and connectors are also a risk management consideration. Keeping some extra fuel line and any connectors that are known to fail on board are worthwhile risk mitigants. Shop Truck Fuel System Given that the shop truck was a ground-up build, we had a clean slate with which to start. We began with identifying the following initial design requirements. Fuel range of at least 500 miles loaded. Efficient change of the primary pump in field. Redundancy for in-tank fuel pump failure (multiple tanks). Integrated fuel level sensor across all fuel storage tanks. The fuel range is a function of the weight of the vehicle, fuel efficiency, travel conditions (i.e., 70 mph freeway or 55 mph back road). We settled on a 60 gallon on board capacity with the ability to carry up to an additional 24 gallons in fuel cans. Fuel System Design The LT4 engine in the truck uses its own fuel pump controller that works using pulse width modulation to supply the appropriate pressure and volume to the engine. Thus, controlling the primary pump was not a problem and amounted to connecting the wires from the LT4 fuel pump controller. The engine has an internal mechanical fuel pump that supplies the high pressures required for a direct injection fuel system. Each of the three fuel tanks contain an electric fuel pump in the tank. Each of the pumps supplies fuel to a fourth tank, which is a “fuel surge tank” that contains roughly a liter of fuel. Fuel surge tanks are commonly used in race cars that do not have a proper fuel cell to manage the effects of acceleration and cornering. In our case, the surge tank allows us to situate the primary pump up in the engine compartment where it can easily be serviced/replaced. The surge tank provides the additional benefit of guaranteeing fuel availability on severe inclines. The primary pump supplying fuel to the engine is a ‘dead end’ arrangement, where all fuel going to the engine is burned and none is returned to the surge tank. The exhibit below illustrates the fuel system in the shop truck.
More posts